
As a marketer, one of the reasons I think it’s fun to work in email is that not only are we sending messages, but we are also receiving them. Being on both sides is a great way to gain perspective as to what those on your list are experiencing.

As a result, I’m going to talk about whitelists from two distinctly different perspectives:
- As a recipient of email marketing.
- As a marketer sending email.
Here’s a recent example that shows why this is important: Just this week, I went looking for a purchase confirmation for a small Sago palm that I’d ordered online. It should have been in my inbox … but I could not find it. I was curious about when my plant would arrive — and I was hoping that I had actually completed the order.
I decided to check my spam or junk folder. And guess what – there it was. Sigh.
I imagine I’ll be ordering from this merchant again, so I decided to whitelist their email address.
For more on the what, why, and how of whitelisting an email, read on.
Table of Contents
What is a whitelisted email?
A whitelisted email is an email from a sender that the recipient designates as trusted, allowing messages from that address to bypass spam filters and be delivered directly to the inbox.
Why whitelist emails?
As a recipient, you’ll want to whitelist the sending address of people and brands that you trust – whose messages you want delivered to the inbox, not to the spam folder.
This could include:
- Family and friends.
- Schools, churches, volunteer organizations, and other institutions.
- Utilities, mortgage companies, and others who send you bills.
- Publications that send you alerts and newsletters.
- Local and national businesses that you purchase from.
- Others whom you interact with via email.
The good news is that it’s relatively easy to white list an email sender. Step-by-step directions for how to do it follow.
The exact process varies based on what you use to read your email; we have detailed instructions for:
- Gmail
- Outlook
- Yahoo
- AOL
- Apple Mail
- Windows 365 Desktop
- ProtonMail
Why prompt your subscribers to whitelist your email?
Now, let’s put on our email marketer hats.
Many of my clients send email newsletters – some of them are subscription-based, meaning that readers pay to receive them. And when one of those lands in the spam folder instead of the inbox? We usually hear about it.
It’s an occupational hazard of being an email marketer: At some point, a message you send will end up in the spam folder. It’s inevitable.
We all know what it means when your email lands in the spam folder. Images are blocked, links are disabled … but that isn’t the worst of it. Your email is much, much less likely to be opened, read, and acted on if it’s diverted to the spam folder.
And this means that even if you crafted a perfect subject line, wrote amazingly persuasive body copy, and had a fabulous call-to-action, it doesn’t matter. The spam folder negates all that.
Here’s the thing: Often it’s not your fault when your email lands in the spam folder. You can follow best practices, keep your list clean, confirm that your email authentication protocols are in place and still have your email messages sent to the spam folder.
But there’s one more thing you can do to help ensure your emails reach the inbox: Ask your subscribers to whitelist your email address.
When an email address is whitelisted, messages sent from it are almost guaranteed to reach your recipient’s inbox – not the spam folder. When your readers whitelist your email address, it tells the algorithms that control inbox and spam folder placement that the recipient trusts you and that they want to receive email from you.
How to Get Subscribers to Whitelist Your Email Address
There’s only one way to get your email address whitelisted – you have to ask your subscribers to do it. This is true whether you are B2B, B2C, or something else.
A whitelist request used to be a standard part of the new subscriber onboarding process. You see it less these days, but it’s still a good thing to do to help your messages reach the inbox.
Here’s an example: A note like this would appear on a confirmation page when sign-up was complete and/or in the welcome email (feel free to copy this – the link will bring your subscribers back to this page for detailed instructions):
Thanks for signing up to receive email from [Your Brand Here]; please whitelist our sender address, which is [Your Sender Address] to be sure our emails reach your inbox. Not sure how to whitelist an email address? Here are detailed instructions from Hubspot.
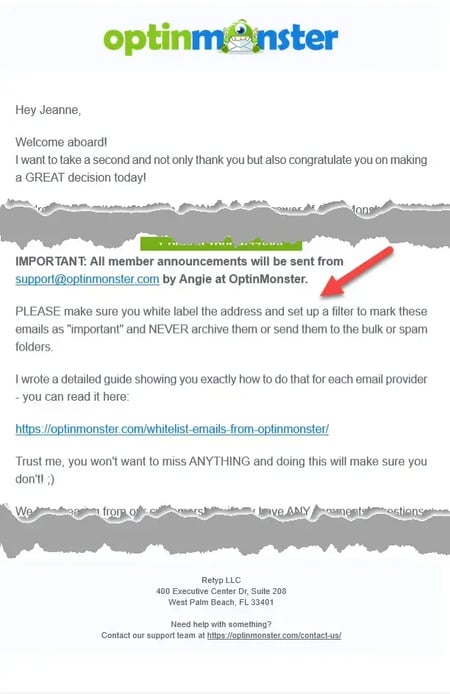
Here’s an example from my inbox of a welcome message with a whitelist request in it. It’s pretty lengthy, and it appears in the middle of a long welcome email (see the arrow I added).
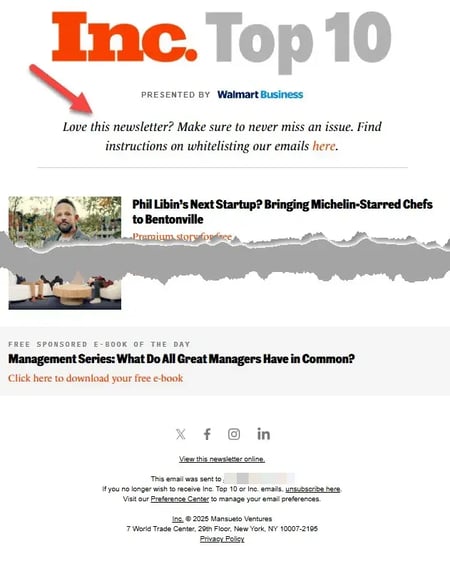
But whitelist requests aren’t just for onboarding. Many organizations include them in every message they send, as a consistent reminder to subscribers.
Once again from my inbox, here’s an example where it’s at the top of the message.
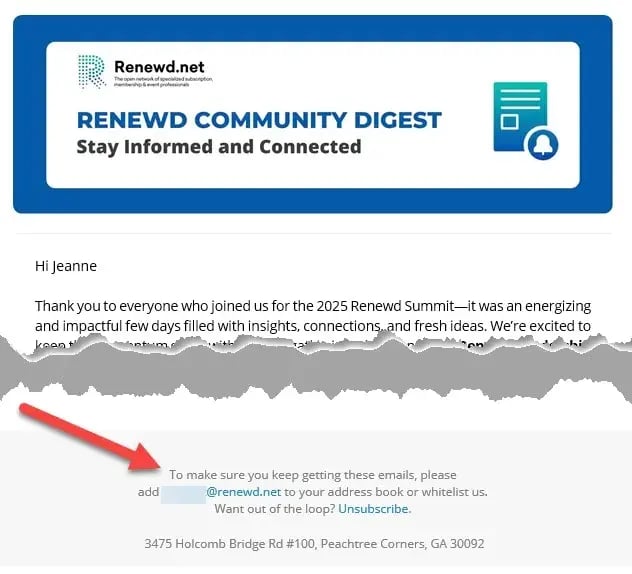
And finally, here’s an example where the whitelist message appears in the footer of each email sent (also from my inbox).
The exact wording of your whitelist request isn’t important, as long as it conveys:
- Why whitelisting is important.
- What email address should be whitelisted for your messages.
- How the subscriber can do it.
Some email tools will automatically whitelist email messages from senders in the recipient’s address book – but some won’t. That’s why the detailed instructions by email tool are so important.
1. Open settings.
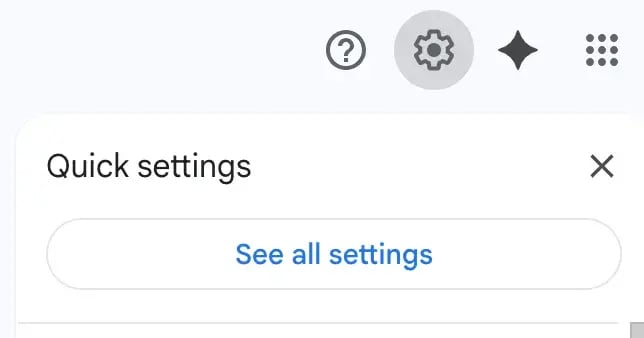
To begin, you need to open your email settings. Click the gear icon in Gmail and select See all settings from the Quick Settings menu.
2. Navigate to “Filters and Blocked Addresses” in the top menu.

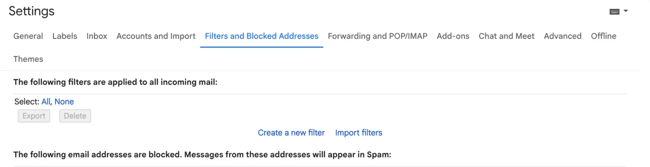
Once you’ve opened your settings, select Filters and Blocked Addresses on the top bar.
3. Select “Create a new filter.”
In Gmail, whitelisting an email actually involves creating a filter, so you need to select the Create new filter button.

4. Add a specific email or a whole domain in the “From” field.
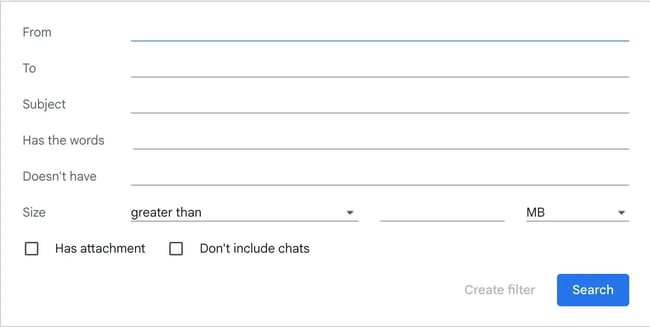
Now it’s time to specify who you are whitelisting. You do this by entering in a specific email address (e.g., hello@domain.com) or a whole domain by omitting everything before the at symbol (e.g., @domain.com) in the “From” field.
The former will whitelist one specific email address, while the latter whitelists anyone who is sending emails from that domain.

5. Click “Create filter.”
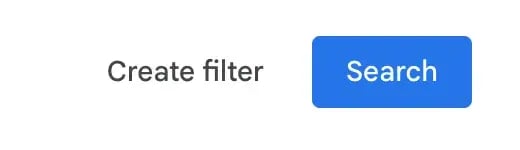
From there, all you need to do is click the Create filter button at the bottom of the window (next to the blue “Search” button).
6. Check “Never send it to Spam” in the checkbox.
Clicking the Create filter button brings up a new window where you actually specify what you’re doing with those emails. In this case, you’re whitelisting. In Gmail, you do this by ticking the Never send it to Spam box.
This will ensure that emails coming from the sender or domain you specified never end up in Spam or Trash.
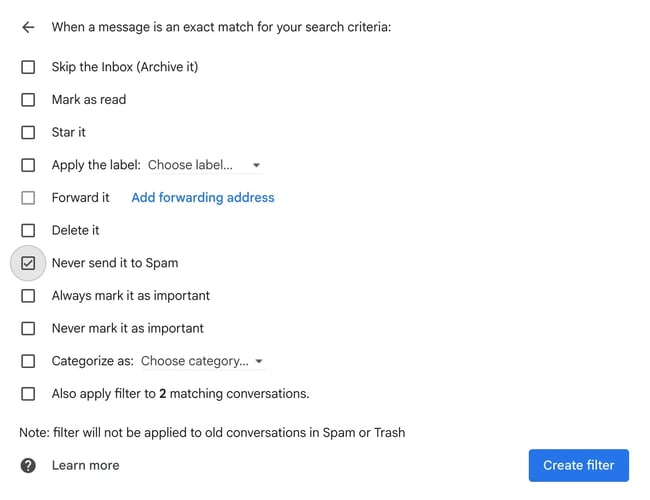
As you can see, you can also add other filters here if they are relevant to those email addresses.
7. Click “Create filter.”
Once you have selected your filter, simply click the blue Create filter button again, and this creates the whitelist within Gmail.
Note: The default email provider for Android is Gmail. Follow the above instructions to whitelist emails on your Android device.
1. Go to settings in Outlook.
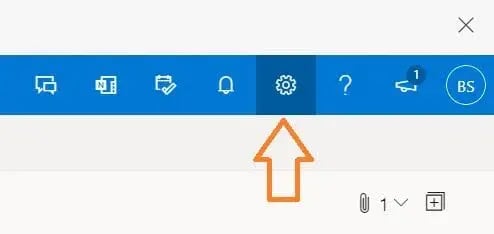
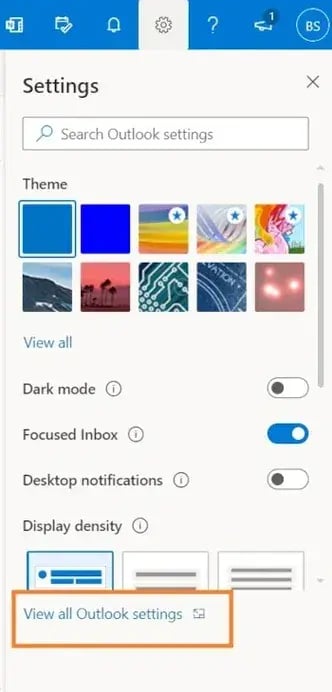
To start, click the gear icon in Outlook. When you select it, a drop-down menu will appear and you’ll choose View all Outlook settings at the bottom.
2. Select “Mail” from the settings menu.
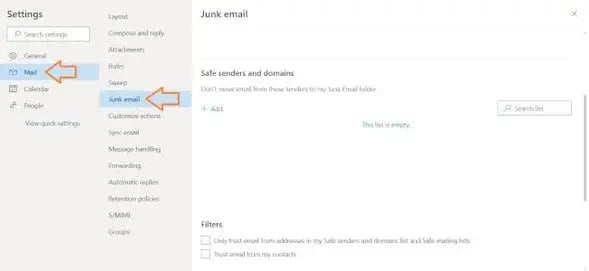
On the sidebar, click Mail.
3. Choose “Junk email” from the submenu.
After clicking Mail, a submenu specific to mail will pop out. Choose Junk email.
4. Click “Add” under “Safe senders and domains.”
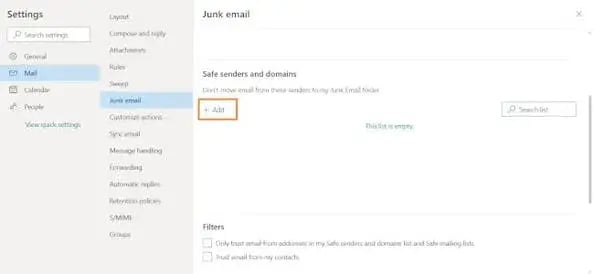
You’ll see the heading Safe senders and domains. Click + Add to whitelist specific addresses and domains.
5. Enter the email address that you want whitelisted.
A field will appear below Add. Just like in Gmail, you can either enter a specific email address (e.g., hello@domain.com) or a whole domain (@domain.com).
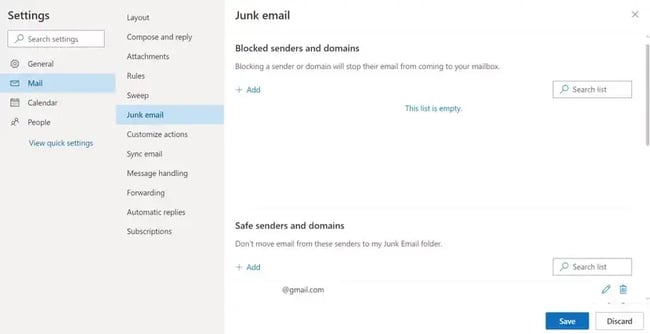
6. Choose “Save.”
Then click Save. This will save your whitelist preferences and ensure that emails from those senders don’t end up in your junk email folder in Outlook.
How to Whitelist an Email in Yahoo
- Open Yahoo Mail and log in.
- Navigate to “Settings” then click “More Settings.”
- Select “Filters” and hit “Add new filters” to enter the email you’d like to whitelist.
- Name the filter and add the email address.
- Select to send all mail to “Inbox.”
- Save your settings.
1. Open Yahoo Mail and log in.